RSS

Category Archives: Uncategorized

The Pi Project

A short beginners course to get started with the Raspberry Pi. It has step by step guides, project ideas, links to programming courses, and Minecraft!

If you want to get started with the Raspberry Pi, I recommend going over this.

http://prezi.com/yy-6u7f0laga/?utm_campaign=share&utm_medium=copy&rc=ex0share

 
Leave a comment

Posted by on May 21, 2014 in Uncategorized


The Year is Over

0702a

When I started my independent studies I set a goal. “My main goal is to learn all about the Raspberry Pi and use it as an educational tool. I want to learn advanced programming skills and the wide range of possibilities the Raspberry Pi offers.” I believe I was able to accomplish this goal. However there is so much more out there. The possibilities are endless and every day someone new comes up with a mind blowing project. I will definitely buy a Raspberry Pi when I go off to college and keep exploring this amazing machine. If you are a computer geek like me and have a crazy imagination, I strongly recommend using the Raspberry Pi to make those imaginations come true.

Tutorials:

SET UP: https://hapaboy12.wordpress.com/2014/05/02/set-up-the-pi/

SDR: https://hapaboy12.wordpress.com/2014/05/06/sdr-on-pi/

RETRO PI: https://hapaboy12.wordpress.com/2014/05/09/my-favorite-project-the-retro-pi

Pi Face: https://hapaboy12.wordpress.com/2014/05/05/pi-face/

Interesting Pi Projects

Pi Projects #1: https://hapaboy12.wordpress.com/2014/04/11/pi-projects-1-2/

Pi Projects #2: https://hapaboy12.wordpress.com/2014/04/29/pi-projects-1/

CNET: http://www.cnet.com/search/?query=raspberry+pi

Raspberry Pi: http://www.raspberrypi.org/

Engadget: http://www.engadget.com/search/?q=raspberry+pi

Useful Links


Leave a comment

Posted by on May 13, 2014 in Uncategorized


My Favorite Project: The Retro Pi

*As a kid I always wanted a Play Station or XBox but my anti gaming mother never bought me one. My brother got me a Game Boy when it first came out and ever since I have been playing games on portable devices. When Dr. Bill told me about the Raspberry Pi and it’s endless possibilities, the first thing that came to mind was, maybe I can make a game console. I was originally dreaming of a powerful gaming console like an XBox but as I familiarized myself with the Pi, I realized that it does not have nearly the processing power to run modern games. This did not stop me from making a gaming console though. If I can’t go modern, I’ll go retro. I did some research and found that it is possible to make a retro gaming console on the Pi. 

What You Need
– Raspberry Pi
– 4GB SD Card
– USB Keyboard and Mouse
– Ethernet Cable
– Monitor with HDMI
– Copy of Cyberduck (Software for direct file transferring)
– Game ROMS (Copy of games)
– USB Game Controller (Optional)
Download and Install
1. Before beginning, you must download the RetroPie SD card image.
http://blog.petrockblock.com/download/retropie-project-image/
2. Now you need to extract the image to a SD card. If you are a Windows user, use theWin32DiskImager. Mac users can use the RPI-sd card builder. Its the same procedure as burning Raspbian.
3. When you are done, remove the card from your computer and put it in your Pi. You are ready!!
Set Up

Next up we’ll boot up your Raspberry Pi. Plug in one of your controllers and your keyboard to the Raspberry Pi. Turn the Raspberry Pi on and it should boot directly into EmulationStation. On the first boot, you’re asked to set up the controls for EmulationStation. I bought a really cheap controller off Amazon and it was delivered in less than a week.

Follow the screen with your controller to set it up. When you’re finished, you can navigate through EmulationStation with just your controller. These controls will not work with the emulators—that takes an extra step we’ll get to in the next section. After you confirm your controller works, pull up the menu (you picked the button for this during the prompts, mine is the Start button), and exit EmulationStation to go to the command line.

Controller Configuration

This looks a little daunting at a glance, but it’s actually very easy and only takes a few minutes to do. Once you’re in the command line, it’s time to calibrate your controller. This takes a few steps. With your controller and keyboard still plugged in, type this into command line

cd RetroPie/emulators/RetroArch/tools
./retroarch-joyconfig >> ~/RetroPie/configs/all/retroarch.cfgP

Next, grab your controller and follow the onscreen prompts to set up your button configuration. Your controller may lack some of the buttons the prompts want you to set up (for example, SNES controllers don’t have joysticks or R2/L2, R3/L3 buttons), so just press any button during those prompts.

Roms to Pi
For those who don’t know, ROM stands for read only memory and it is basically the file that includes the game. It is a file extracted from the old cassette and turned into a computer file that emulators can read. Type in NES ROM on google and many sites will show up.
  1. Make sure your Raspberry Pi is on, and connected to your router.
  2. Now head over to your primary computer and connect to your Raspberry Pi with Cyberduck or any SSH tool.
  3. Navigate to RetroPie > roms.
  4. Copy over any ROMs on your computer to the corresponding system folder and you’re done.

From here on out, you’ll be able to easily copy ROMs to the Raspberry Pi remotely through this method, so don’t worry if you want to add more down the line. Once the file transfer is done, go ahead and reboot the Raspberry Pi with your controllers connected and everything should be good to go.

CLICK FOR A GIF

2013-10-10 10.40.59

 
Leave a comment

Posted by on May 9, 2014 in Uncategorized


rPlay

*rPlay is a way to turn you Raspberry Pi in the an airplay device. Since it is still a beta version you might come into multiple issues when playing video or audio. If it does not work, restart the Pi or back track and see if you missed anything when setting up the device.
license key: S1377T8072I7798N4133R  (you need to enter this in step 4, make sure no spaces are entered)
Requirements:
Your Pi device needs to have Internet access.
No X Windows environment is required. rPlay runs on a dumb terminal.
Instructions:
(1) update firmware: (you may skip this step, and perform the rest first, if not working well, then do this)
   sudo apt-get install rpi-update
   sudo rpi-update
(2) allocate more memory to GPU
   sudo raspi-config
   then select memory_split, change the value to 256 if you have a Model B device, or 64 or 128 if you have Model A device.
(3) prepare dependencies, run the following command on Pi
   sudo apt-get update
   sudo apt-get install libao-dev avahi-utils libavahi-compat-libdnssd-dev libva-dev youtube-dl
   sudo youtube-dl –update
(4) download, install and run
    wget -O rplay-1.0.1-armhf.deb http://www.vmlite.com/rplay/rplay-1.0.1-armhf.deb
    sudo dpkg -i rplay-1.0.1-armhf.deb
this will install and launch /usr/bin/rplay, and it runs automatically on boot.
you can try to reboot your Pi at this point, and rplay should auto start after reboot. No need to do step (5).
(5) manual start and stop
    sudo /etc/init.d/rplay start  (NOTE, DON’T start this after step 4, step 4 auto starts rplay, if you have 2 instances of rplayrunning, none would work!)
    sudo /etc/init.d/rplay stop
if you want to see the output message, you can run this way:
    sudo /user/bin/rplay
Make sure only one instance is running.
(4) THIS IS VERY IMPORTANT, enter the license key, without it, AirPlay mirroring won’t work
Safari browser has problems, try to use other ones.
once rplay is running, go to a browser and open this url:
   http://<ip-address-of-pi>:7100/admin
or
   http://localhost:7100/admin   if you use the browser on the same Pi machine.
the username/password is: admin/admin
go down to the last one, enter the license number, click Submit.
You can also perform other admin tasks here, such as setting password, toggling fullscreen, recording, etc.
the config file is /etc/rplay.conf, you can also manually edit the config file, instead of using the web interface. Append license_key=<your-license-key>
to the last line of the file, for example:
  admin_password=admin
  password=
  onscreen_code=0 [or 1]
  fullscreen=0 [0r 1]
  license_key=1223dd-your-from-email
(5) test regular AirPlay and AirPlay Mirroring
rPlay supports AirPlay and AirPlay Mirroring. For iphone 4 and iPad 1, you can’t do AirPlay mirroring, but you should be still
do AirPlay for Photos/Music/Videos. For iPhone 4S and iPhone 5, iPad 2 and above, you can also do AirPlay mirroring.
on your iOS devices, double click Home button, slide to the most left, and choose rPlay as AirPlay device to connect.
for iOS 7, you need to quickly swipe up from the bottom to bring up AirPlay window, and choose rPlay as AirPlay device to connect.
(6) test Chromecast
you need to install and update youtube-dl on pi, run the following command on Pi to auto update it:
  sudo apt-get install youtube-dl
  sudo youtube-dl –update
right now, this is very simple implementation, it only works with YouTube app, either on Android or iOS.
make sure you download the latest YouTube app on your mobile device, then open YouTube app, pick a video to play, on the top right corner,
there will be a square chromecast button, tap it, and choose rPlay to connect.
the video should play on Pi, it won’t be able to control with this version, we will improve it.
(7) uninstall rplay
   sudo /etc/init.d/rplay stop
   sudo dpkg -r rplay
(8) You are more than welcome to create videos on rPlay, and I’d appreciate if you can spread the words and promote our software.
(9) If rplay is not found by your devices, you can try to toggle WIFI on your devices, turn it off and then on. You may also power off your router
then power it on.


Leave a comment

Posted by on May 7, 2014 in Uncategorized


SDR on PI

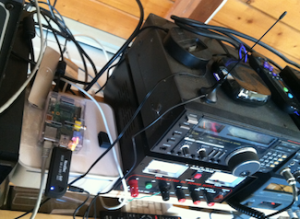
*Here is my first tutorial on how to build a Software Defined Radio using the Pi.

Idea:

The idea of making a software defined radio using the Raspberry Pi came when Dr. Bill asked if I could make a SDR to put down at Kohala Ranch. The problem with Kohala Ranch is that it can get extremely hot and regular computers and SDRs overheat in high temperatures. Since I was working with the Raspberry Pi, I thought it would be the perfect device to turn into a Raspberry Pi.

Hardware:

This project did not require any expensive hardware. After researching online, I found a highly recommended dongle that will allow the Pi to pick up radio signals. As shown in the picture ro the right, the dongle is the RTL2832U.Other than the dongle, all I needed was an ethernet cable and a Raspberry Pi. The total cost came out to be about $50. Regular SDRs can cost from $200 to $5,000. The Raspberry Pi SDR is a great tool for students who want to learn about radios but do not have the money to buy an expensive SDR. Although the antenna that comes with the dongle is small, I had no problem picking up frequencies. To pick up weaker signals, I will replace the antenna with a stronger antenna or a dish. The hardware part of this project was very simple and I did not come across any problems.

Software:

To put the required software on the Pi, I followed multiple websites. After familiarising myself with the procedures, it became very easy. Here is a quick tutorial on how to install the software.
Step 1.
Install the latest Debian (Rasbpian) on the Pi and update it.
Step 2.
Install the following dependencies by typing the following commands. This allows the Pi to install and compile the RTL drivers.
sudo apt-get install git
sudo apt-get install cmake
sudo apt-get install libusb-1.0-0.dev
sudo apt-get install build-essential
Step 3.
After installing the dependencies, we are ready to install the drivers. This allows the Pi to access and run the RTL dongle.
git clone git://git.osmocom.org/rtl-sdr.git
cd rtl-sdr/
mkdir build
cd build
cmake ../
make
sudo make install
sudo ldconfig
Step 4.
Now we are ready to connect the dongle and test it. Plug the dongle into the Pi and enter the command rtl_test -t. This command is to make sure that the Raspberry Pi sees the dongle. Be sure that port 1234 is open on your router. If the rtl_test -t works, the command prompt should look like the following.

Step 5.
To start the rtl server, enter rtl_tcp -a and the ip address of the Pi. For example, I would type rtl_tcp -a 10.14.250.95 to start the server. If it starts properly, it will look like this. You are done with the software part of the project.


Using the Radio:

After researching, I found a few applications to access the SDR server. GQRX and SDR# were the two best applications I found. GQRX runs on OSX and SDR# runs on Windows. Personally I found SDR# more user friendly. The set up is very easy. Between the “Play” and “Configure” buttons you can choose what type of SDR to use. Pick RTL-SDR/TCP. Press configure and type in the IP address of the Pi. It will help if your PI has a static IP address. All you have to do is press “Play” and the radio will start.
 
Leave a comment

Posted by on May 6, 2014 in Uncategorized


Pi Face

*The Pi Face is an extension board to the Pi. If you are interested in home automation or robotics, the Pi Face is a great tool to use. “PiFace Digital allows you to connect things like switches, lights and motors so your Raspberry Pi becomes aware of, and can influence the world around it.

You need:

– Raspberry Pi
– SD Card
– PiFace
Step 1 <Basics>
Before starting you should have a SD Card with Raspbian loaded on to it. For the basic set up of Raspbian, check this website -> http://elinux.org/RPi_Easy_SD_Card_Setup
To ensure that you can easily install all the PiFace software and make sure everything works, you should first update Raspbian. Log into Pi and type the following.
sudo apt-get update
sudo apt-get upgrade
When asked enter “y”. The update and upgrade can take a while.

Step 2 <Enable SPI (Serial Peripheral Interface)>

The PiFace needs access to the Raspberry Pi’s SPI pins to function. To enable the SPI you must first update raspi-config tool. To do this enter the following.
sudo apt-get install raspi-config
Enter “y” when asked.
Now that it is updated, open raspi-config by typing
sudo raspi-config
Select “Option 8 Advanced Options”. Choose “A5 SPI” and set it to “Yes”. Select “Ok” then “Finish”.
Step 3 <Install PiFace Digital Modules>
To install the software enter the command
sudo apt-get install python3-pifacedigital-emulator
Enter “y” when prompted.
If you like to use python 2 instead of python 3, replace “python3” with “python2” in the command above.
After installing the software reboot the Pi with
sudo reboot
Step 4 <Connect PiFace>
Make sure that power is not connected to the Pi when attaching the PiFace.
The PiFace fits neatly above the Pi and connecting it is very easy. Check that all the pins are aligned and connect the two boards.
Simple Python:

 
Flash LED:
from time import sleepimport pifacedigitalio as p
pinit()
while(True):
p.digital_write(0,1) #turn on sleep(1)
p.digital_write(0,0) #turn off
sleep(1)
Turn Relay On
import pifacedigitalio as p
p.init()
p.digital_write(0,1)
Other Expansion Boards
 
Leave a comment

Posted by on May 5, 2014 in Uncategorized


SET UP THE PI

fcece

Setting Up the Raspberry Pi for Beginners

*So you have a couple options before you setup the Raspberry Pi. You can directly burn Raspbian (Linux based operating system for Pi. Most common) or get NOOBS, which will give you an option to pick from multiple operating systems. If you have a SD card that came with the Raspberry Pi, it will most likely have NOOBS on it.

Directly Using Raspbian

*If you’re looking to use your Raspberry Pi as a general computer, you may want to consider the Raspbian distribution. Raspbian is a version of Debian Linux specifically configured to run on the Raspberry Pi and is recommended by the Raspberry Pi Foundation as the operating system to install. 

Basic Set Up

Raspbian is available for free from the Raspberry Pi website. Under the header “Raspbian ‘wheezy’”, download either the torrent or direct download. Once you have the ZIP file downloaded to your computer, unarchive it. There will be a single .img file inside. This is the disk image you will flash to the Raspberry Pi’s SD card.

Burning The Image

Burning the image to the Pi is probably the hardest part of this entire process. Since there are different ways depending on your operating system, it will be hard to explain by words. Instead, watch this Youtube Video. It takes you through the process.

https://www.youtube.com/watch?v=aTQjuDfEGWc

If you like reading instead of the video, go to this site. This site not only explains how to set the Pi up with Raspbian but also has many informing tutorials and projects. The second link is the official Raspberry Pi setup document.

http://elinux.org/RPi_Easy_SD_Card_Setup

http://www.raspberrypi.org/wp-content/uploads/2012/12/quick-start-guide-v1.1.pdf

After Booting Raspbian

Now you have a fully functional computer in the palm of your hands!! You are not done yet though. After booting, it will take you through a basic set up that is self-explanatory. When you are done with the set up, the system will reboot and you will be sent a command line. Don’t worry that’s what its suppose to look like. The most important thing to remember is that the username is pi and the password it raspberry.  After typing this in you will see something like pi@raspberry ~ $ . Now you can use Linux commands to guide through the operating system. For those who don’t know Linux or don’t like the command line, type startx and this will take you to the GUI. You have everything set up!! Now create something awesome and share it to the world here.

http://www.raspberrypi.org/forums/


Leave a comment

Posted by on May 2, 2014 in Uncategorized


Why the Pi? #2

*I posted this on my Advance Computer Science blog and thought it would be appropriate for this blog.

I had many independent projects this year but one of my favorite projects was working with the Raspberry Pi. I believe it is one of the greatest tools for learning computer programming. I learned a lot of my basic skills from playing with the Pi. As Dr. Bill always says, “we never read instruction manuals.” Indeed, I barely read any instruction manuals. The first time I got a Pi, I plugged it in and just explored through the command line and GUI. Using the command line, I learned more about Linux. Starting off with Linux teaches people how a computer works. Many people only know that a computer “works” but they do not know “how”.

Linux is like the behind the scenes of a movie called the “computer”. I also learned networking and programming using the Pi. The Pi runs Python and you can connect different boards to expand the use of the Pi. Using Python, you can unleash the possibilites the Pi offeres. Things like home automation and robotics become possible. When Dr. Bill told me anything is possible with the Pi, I did not think it would go this far. If you go to the Raspberry Pi forums, you can see the endless projects that people around the world have worked on.

http://www.raspberrypi.org/forums/

Home automation seems easy when you look at the amazing projects some people do. The Pi is also becoming so popular that there are multiple Youtube channels popping up. The channel Raspberry Pi IV Beginners is a great channel for those who want to start learning how to use the Pi. It teaches you the basics and gives you easy tutorials.

https://www.youtube.com/user/RaspberryPiBeginners

For the advanced, the Ben Heck Show is a great channel. He provides step by step tutorials on advanced projects like creating a hand held video game device.

https://www.youtube.com/user/thebenheckshow

*Here is a little over view of some of the projects I worked on.

AirPi/Rplay

I always wanted a good wireless speaker device at home but never had the money to buy one. When I started playing with the Raspberry Pi, I realised that I could use it like an Apple TV, a wireless bridge between the speakers and my iPhone. I researched and found several softwares, the best being AirPi and Rplay. AirPi was a very easy software to work with. It was built well and worked as soon as I programmed the Raspberry Pi. The only flaw was that it only supported audio. Since I was dealing with an Apple TV software I wanted video to work as well. This is where Rplay comes in. Rplay is still in the process of development and only people who are interested in developing it can gain access to it. I emailed the developers and appealed to them why I wanted the software. They responded in less then a week, telling me how to download and program the Pi with the software. As soon as I programmed the Pi, it was obvious that it was still in development. It did not run well and crashed many times. This project taught me the basics of trouble shooting. I first learned how the program works and from there learned how to fix the glitches.

Apache/Servers

Working with networks in my advance computer technology class, I became interested in networks and servers. I decided that the best way to learn was by learning hands on. I picked up my Raspberry Pi, researched server programs and started. I setup two types of servers with the Raspberry Pi. The first server I setup, was the basic Apache server. I inquired a few troubles on the way but easily overcame them. Having a server encouraged me to learn HTML (Hyper Text Markup Language) to create a home page. It is not the greatest page but I learned the basics and managed to build a simple one. After building my Apache server, I wondered if I could create a media server. I wanted to have a personal server where I could store pictures, movies and backups of my school work. I found a program similar to MAMP (Mac, Apache, MySQL, PHP) that would let me set up a media server. This program was much harder to work with compared to Apache and took me about two weeks to fully understand. However I did not give up and eventually I was able to set up my second server. The Raspberry Pi is the best tool for creating servers because you can keep it on 24/7. Unlike some computers, you do not have to turn off the Pi, thus the server will be up all the time. Building these servers gave me a better understand towards networks and servers.

RetroPi

RetroPi is currently my favourite out of all my projects. It is the reason why I gained interest in the Raspberry Pi. RetroPi is an all in one old school game emulator. It includes game consoles like Super Nintendo, Game Boy, Play Station, and Atari 2600. Like all teenage boys, I love to play video games. However, one difference is that the complicated high resolution video games we see now do not appeal to me as much as simple 8 bit games from the 90’s. I grew up on games like Mario, Street Fighter and Pokemon and I am still not tired of these games. One problem is that they stopped selling retro gaming consoles like the Super Nintendo. When I realised that I could create a retro game emulator with the Raspberry Pi, it immediately grabbed my attention. It took me a while to start this project because it was more difficult than the other projects. It took more time and effort. I needed to find a well developed emulator software that I could use on the Raspberry Pi. I also had to find ROMs (game files) that were compatible. It took a while but I was able to complete my retro gaming console. I also bought a cheap controller because playing games using a computer keyboard was not satisfying. I believe this project is what will grab kids attention. No kid wants to see a black screen with white letters when being introduce to computing and programming. However, if you show that the final product can be a game console that runs Mario and Pokemon, it will get them interested and motivated.

 
Leave a comment

Posted by on May 2, 2014 in Uncategorized


Pi Projects #2

Voice Activation
You know JARVIS from Iron Man? Will these people decided to use the Pi to make a voice activated home assistant program. Its not quite like JARVIS since it won’t talk back to you as if it has a mind of its own but imagine a house where you don’t have to press a button. You can be like “lights on” or “start my coffee”. I’d love to live in a home like that.
http://www.engadget.com/2014/04/09/jasper-voice-activated-assistant-open-source-raspberry-pi/
Hack Drones with the Pi
There’s someone in our class that is working on this so I decided to share it. Using the Pi, you can hack the WI-FI signal the parrot drones emit and hack the machine. Ya it’s not like you see a parrot drone everywhere you go but think about the future of this technology. People will be able to hack military grade drones and take over the commands. That doesn’t sound so good…
http://www.engadget.com/2013/12/04/skyjack-parrot-drone-raspberry-pi/
Pi Camera
How cool is this?? It’s a fully functional touch screen camera that runs off the Pi. It doesn’t match the quality of the digital cameras now but just the idea of using a camera that you created yourself will be a big satisfaction. Maybe soon we will have DIY camera kits that we can customise an make it meet are own needs.
http://www.engadget.com/2014/01/15/adafruit-raspberry-pi-camera/
 
Leave a comment

Posted by on April 29, 2014 in Uncategorized


Accident…

So this weekend wasn’t the best of weekends. I broke my hand at a volleyball game and guess which hand I broke, the right hand. I cannot use my right hand at all but it doesn’t really affect my typing. I have surgery later this week and hopefully my hand will heal quickly and properly. I decided to take it easy and start my quest for interesting Raspberry Pi projects. I found that the Raspberry Pi is the best tool to use for teaching computer science. This is perfect because Dr. Bill is planning to use the Pi in his computer science class next year. I hope I can find some cool projects that will inspire next year’s people to invent something. 

I’ll try my best to keep this blog going. The lesson learned is don’t punch something you can’t break…(the floor)

 
Leave a comment

Posted by on April 22, 2014 in Uncategorized